DIY Easter Baskets
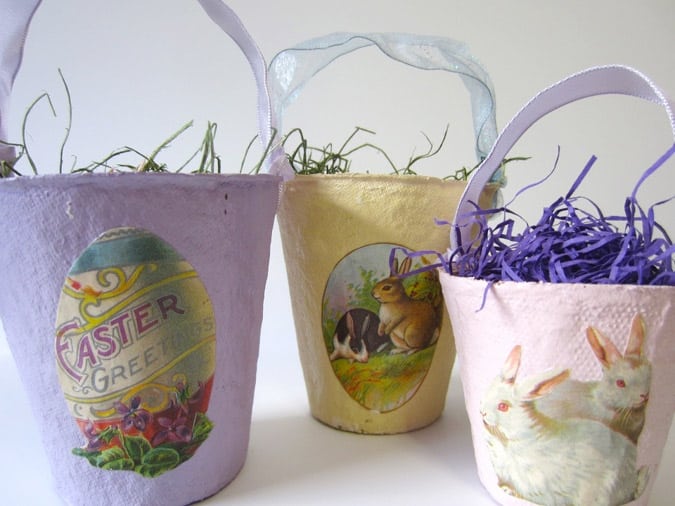
Easter baskets can be purchased in a variety of shapes, sizes, and themes. But if you are uninspired by the selections available in stores, or if you love crafting, you can make your own! These DIY Easter baskets evoke a nostalgic feel and are a nice size for party favors, gift giving, or decorating an Easter […]


Photo Credit : Bonnie Thomas
Materials needed to make Easter Baskets:
- Peat pots (you can find these at a garden center or hardware store–”Jiffy peat pots” are one brand you can look for)
- Pastel acrylic paints– choose one to a few pastel colors such as pink, lavender, spring green, pale yellow, robin’s egg blue, and/or teal. The more baskets you make, the more color options you might want.
- White acrylic paint
- Paintbrush
- Wired ribbon to match your baskets
- Scissors
- Vintage Easter images such as stickers, images ordered or downloaded from the web, or images purchased from the craft store (i.e. from scrapbook paper).
- Mod Podge or other decoupage glue
- A hole punch
- Basket fillers such as faux grass and candies

Photo Credit : Bonnie Thomas
Directions for making DIY Easter Baskets:
- If you want to lighten the tones of any of your pastel paints, mix them with white acrylic paint. I use almost 1/2 white + 1/2 pastel color to paint my baskets but you can create the color tone that looks best to you.
- Paint the inside of the peat pots.
- Allow the pots to dry.
- Paint the exterior of the peat pots.
- Allow the pots to dry.
- Cut out the images you want to attach to your baskets.
- Apply a thin layer of Mod Podge to the back of an image and place it on a basket. Press the image down to remove bubbles and smooth the image. Repeat this step till you have one image on each of your baskets.
- Use a clean paintbrush to apply another thin layer of Mod Podge over the image. This will seal it onto the basket.
- Punch 2 holes in the top rim of each basket, making sure the holes are to the left and to the right of each image. This will ensure that your images are centered on your baskets.
- Cut strips of wired ribbon. Pull the ribbon through one hole and twist it into place. Bring the other end of the ribbon to the other hole and twist that one into place. This will make a ribbon handle for the basket.
- Fill the baskets with Easter grass and candies.

Photo Credit : Bonnie Thomas
Bonnie Thomas
Bonnie Thomas shares her ideas and instructions for simple Yankee crafts. Bonnie Thomas works full time as a child and family therapist in Southern Maine and is also an established artist and author. She has published two books via Jessica Kingsley Publishing, titled Creative Coping Skills for Children: Emotional Support Through Arts and Crafts Activities and Creative Expression Activities for Teens: Exploring Identity Through Art, Craft and Journaling. Don't miss her latest book, How to Get Kids Offline, Outdoors, and Connecting With Nature.
More by Bonnie Thomas

